As great as the ANAVI Light Controller is out-of-the-box, you might want to either customise the firmware that's factory-loaded or add your own behaviour to the Light Controller.

Note that these instructions are using the Arduino IDE on Linux. You can also use PlatformIO, but that's not covered here. This guide is basically a prologue for Leon's excellent guide on flashing the Controller.
Background and Setup
Before you get too far, make sure you have a feel for what you're working with. The Light Controller is an ESP-12E module wired up with 3 pins for each RGB channel, one pin for the button (marked SW1) and one for the LED (marked D1). You'll find the 3 UART pins just below the 3 I2C sensor slots, and the acrylic case even includes convenient cutouts for both the button and UART pins.
Setting up your environment is pretty easy. First, check your USB UART adapter is correctly recognised (as /dev/ttyUSB0 on my Fedora system) and it's strongly recommended you allow your user access to the device without sudo.
On Fedora, this can be done by adding your user to the
dialoutgroup (withsudo usermod -aG dialout $USER) then logging out and back in again.
Finally, make sure you have installed the Arduino IDE. On most Linux distros (especially convenient on Fedora) you can use the Flatpak package from Flathub or you can manually install it.
Get the code
If you're building your own firmware from scratch, just use your own sketch file and skip this section. For everyone else, you can use either the stock firmware file or the much simpler blinking LED demo as a starting point. Either download the file directly or fork and clone the repo with Git to get the .ino file.
Finally, open it up in Arduino IDE!
Set up Arduino IDE
To build and flash the ANAVI Light Controller, you will need to set up the Arduino IDE to suit the Controller.
Add the board
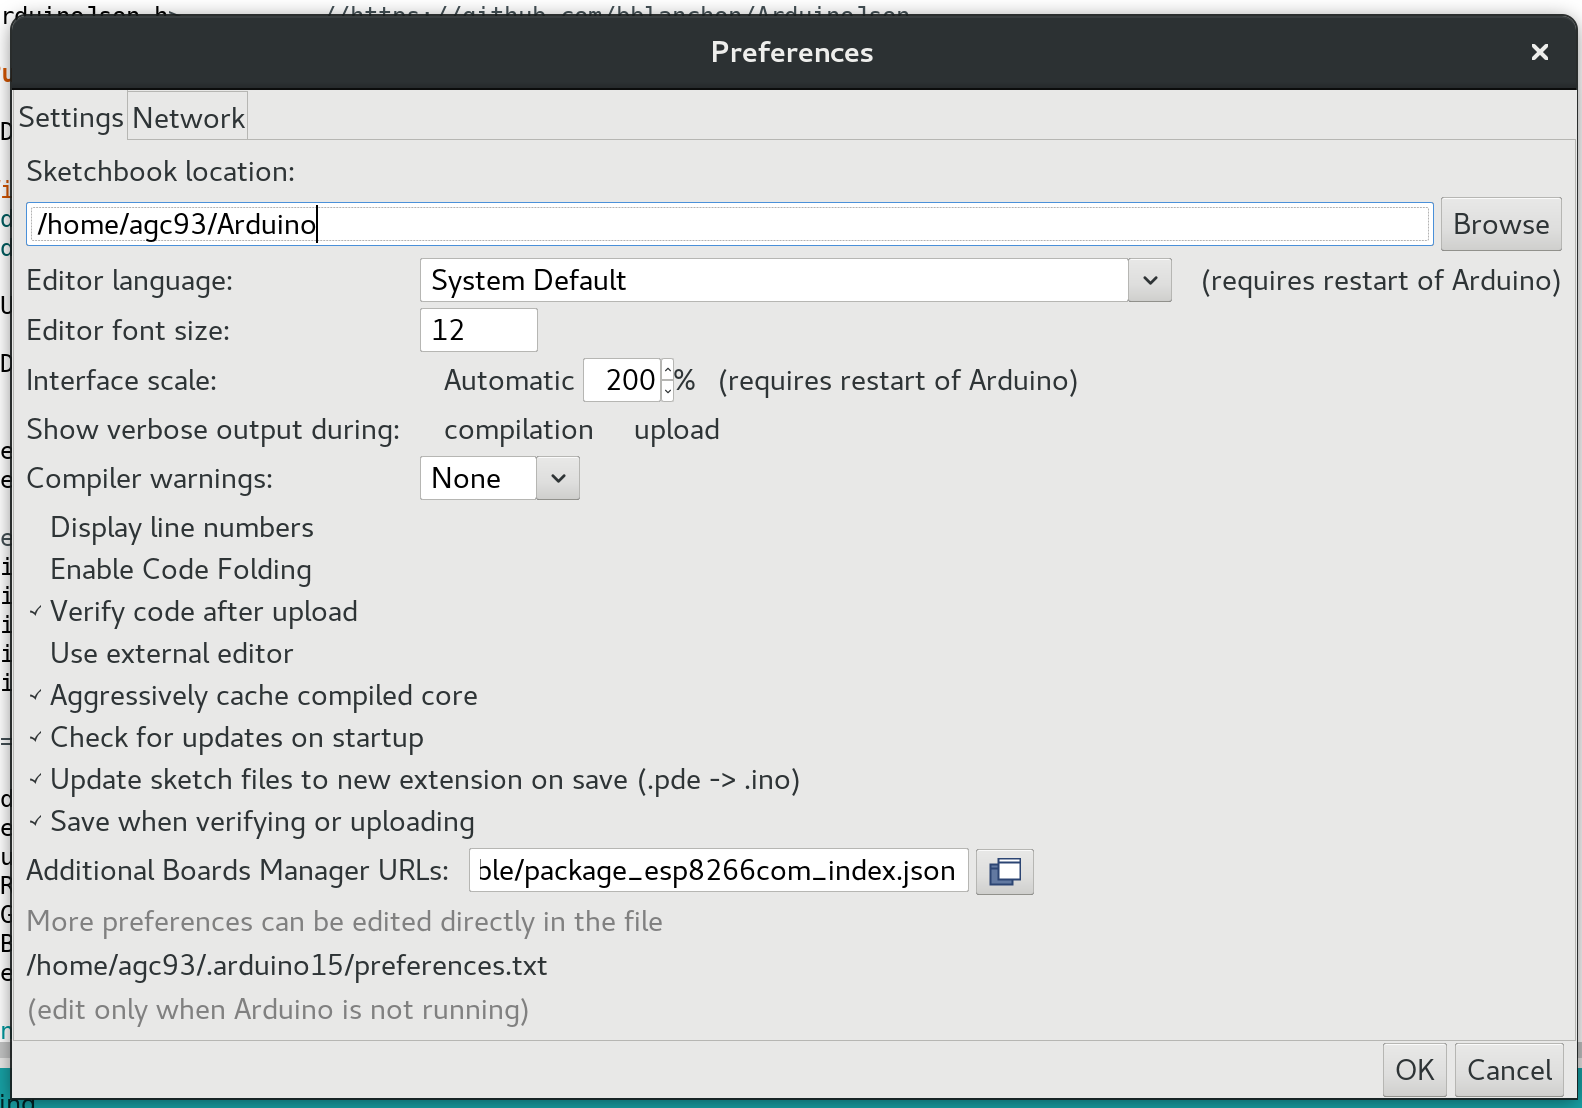
- First, open the File -> Preferences menu and add the following URL to the "Additional Boards Manager URLs" field:
http://arduino.esp8266.com/stable/package_esp8266com_index.json
- Close the Preferences window and open the Tools > Board > Boards Manager... menu to open the Boards Manager. Once the index has updated, use the filter field to find the esp8266 board and install the latest version.
Enable the flash storage
If you want the onboard flash storage to be available, you also need to use the Tools > Flash Size menu to add SPIFFS. Personally, I use the 4M (1M SPIFFS) option and haven't had any issues.
Check the port
Finally, check the port in the Tools > Port menu to make sure you're using your USB UART adapter (usually /dev/ttyUSB0)
Build and Verify
Install the dependencies
Firstly, you need to install your sketch's dependencies. This will be different if you're using your own sketch! If you're using the blinking LED sample, you can skip this step entirely, but if you're building from the stock firmware, keep reading.
Use the Sketch > Include Library > Manage Libraries... menu to open the Library Manager. You will need to install several libraries, so work down the following list, installing the version shown:
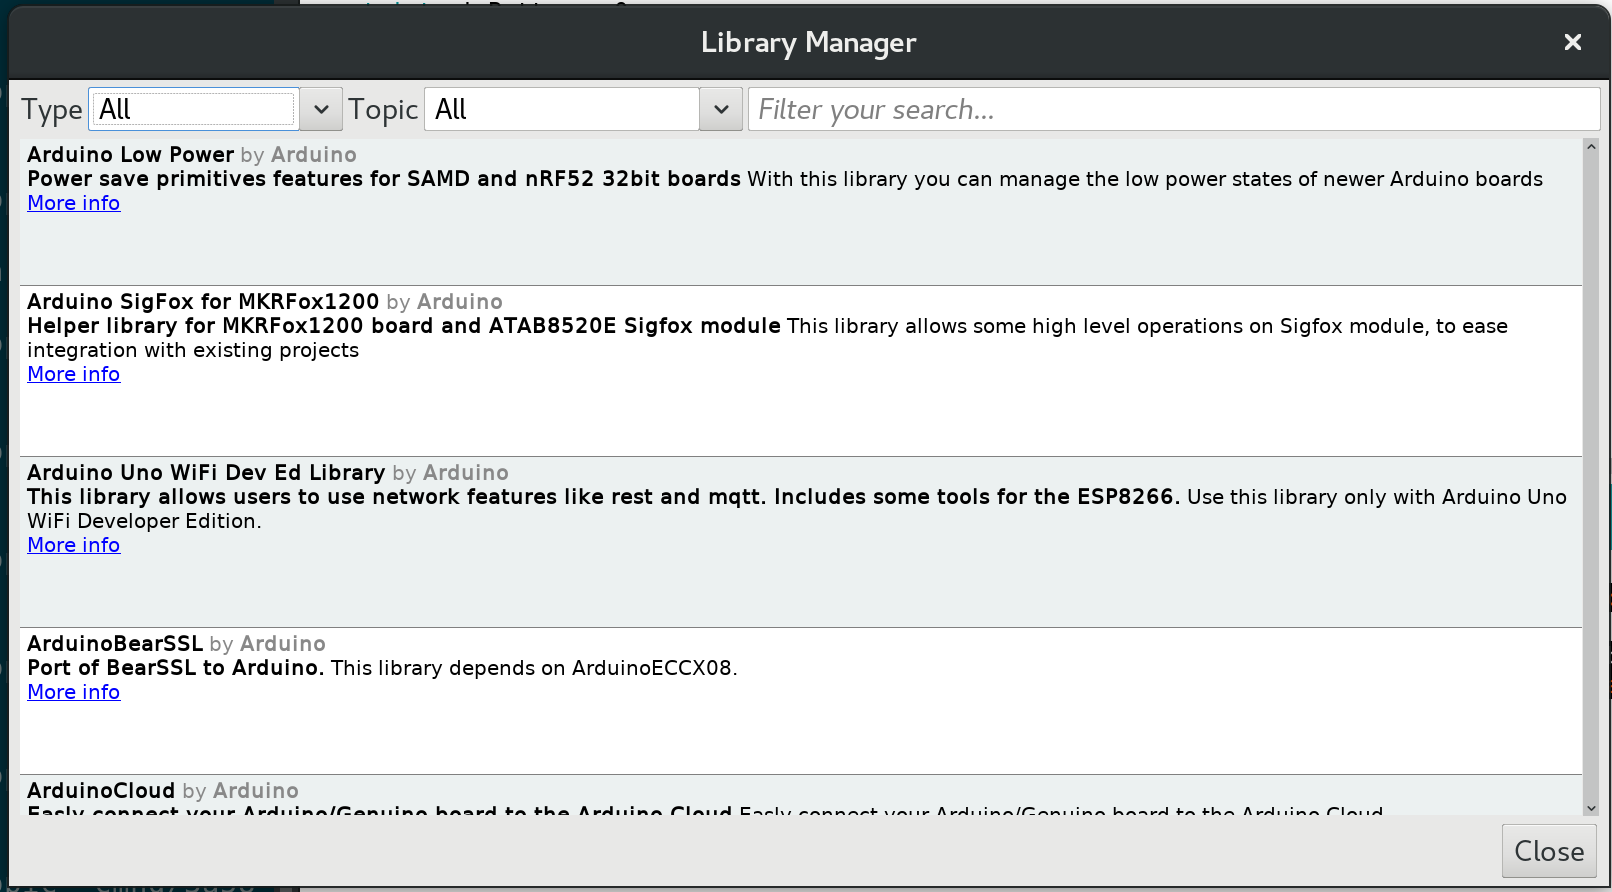
DNSServer(1.1.0)ESP8266WebServer(1.0.0)WiFiManager(by Tzapu, 0.14.0)ArduinoJson(5.13.2, not 6.x)PubSubClient(by Nick O'Leary, 2.6.0)- Adafruit APDS9960 Library (search for
adafruit_apds, 1.0.5) - Adafruit HTU21DF Library (search for
adafruit_htu, 1.0.1)
Build the sketch
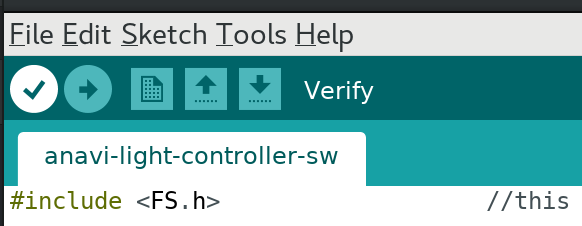
Once you have the dependencies installed and your sketch is ready, just click the check mark button in the top left to build and verify your sketch. Watch the status window at the bottom to make sure there's no errors in building your sketch.
You can increase the verbosity of the build window using the Show verbose output during: option in the Preferences window
Flash the board
This bit is much better explained by Leon, so watch the nice and easy-to-follow video from Leon himself below:
Monitoring your Controller
If your sketch prints to the serial console at all (both of the Anavi-provided sketches do out-of-the-box), you can monitor this by opening a terminal window and running screen /dev/ttyUSB0 115200.
Note that
screenwill own the port while this is running so you will need to close the session (press Ctrl-A and type:quit) before you can upload another sketch using the IDE.