After an excellent question from TorG on my earlier post "Hosting a Ghost blog with NGINX and Docker", I realised I hadn't provided instructions on how to upgrade Ghost when running with the Bitnami Docker image.
This post will assume you set your instance up similar to how I described it in my previous post
So, the high-level approach to an upgrade is this:
- Back up your blog data
- Back up your
ghostfolder - Stop your container
- Pull updated image and re-create
- Restore data
Preparing ahead (the better way)
Now if that seems unnecessarily difficult, you'd be right, and it's (a little bit) my fault! In the original post, to keep things simple, I didn't discuss persistence of your container's data that much. Once you've configured persistence, the upgrade process becomes:
- Pull updated image and re-create
Yep. Simpler, right? Well, first, let's get your data persistent.
Basics of Docker data persistence
There's two types of data you want to persist from your containers: data from your MariaDB database, and data from your Ghost app instance.
For those not used to working with Docker applications, persisting data from containers is achieved using volumes. A Docker volume is a logical unit of data that is mounted into the container file system at a specific location. When data inside the container is written into this location, it is written into the volume, which is kept independently of the rest of the container filesystem.
If you run docker volume ls you should see a list with a few huge and undecipherable IDs
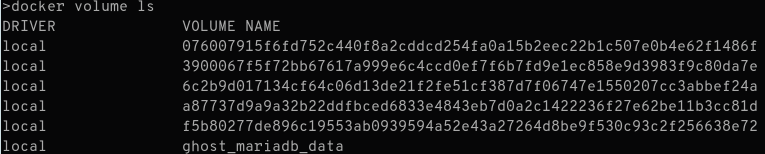
These IDs identify the data volumes. You can use a script like this one to match up your containers and volumes.
Volumes and our Ghost blog
Now, fortunately for us, the awesome guys at Bitnami have already declared the volumes their app uses so Docker should have created them for us.
However, there's not much we can do with these unnamed Docker volumes and it's far too easy to lose data, so let's improve it a bit. Docker (and therefore Compose) supports mounting directories on your host into a container as a data volume. Open your docker-compose.yml and add a volumes key:
services:
  db:
    image: 'bitnami/mariadb:latest'
    volumes:
      - '/path/to/db/data:/bitnami/mariadb' # <-- DB Data
  blog:
    image: 'bitnami/ghost:latest'
    # snipped
    volumes:
      - '/path/to/ghost/data:/bitnami/ghost' # <-- Ghost data
Obviously replace
/path/to/ghost/dataand/path/to/db/datawith real paths where you want the data stored.
For those new to data volumes, this key tells Docker to mount the /path/to/db/data folder on your host at /bitnami/ghost in the container (just like any other device). Any files or changes in the /bitnami/ghost folder will be transparently applied to the /path/to/db/data folder on your host.
If the paths don't exist, Docker Compose will create them the first time you call docker-compose up (which will trigger an auto-creation since the configuration has changed).
Migrating existing data
Now if you already have a running setup, performing these steps will likely reset your blog since Docker will see a "new" volume and mount it in place of the old unnamed ones. To get around this, you can use the docker cp command and the name or ID of your running container instance.
docker cp ghost_db_1:/bitnami/mariadb /path/to/db/data
docker cp ghost_blog_1:/bitnami/ghost /path/to/ghost/data
Again, be sure to replace the names and paths in the above commands to match your environment
You should now be able to change the configuration to use your host volumes.
Upgrading when using host volumes
So if you're using host volumes (as outlined above), what does the upgrade process look like?
docker pull bitnami/ghost:latest
docker pull bitnami/mariadb:latest
docker-compose up -d --force-recreate
That's it! This will pull down the latest tag of Bitnami's MariaDB and Ghost images, and then recreate the running Ghost & MariaDB containers with the new images, mounting your host volumes back in according to your docker-compose.yml file, meaning your data is still there!
How easy was that!
As always, make sure to always keep backups of your blog data (Labs > Export) and at least your
/bitnami/ghost/folder